
Hiking Blister Care: Stop a Hot Spot in 10 Minutes

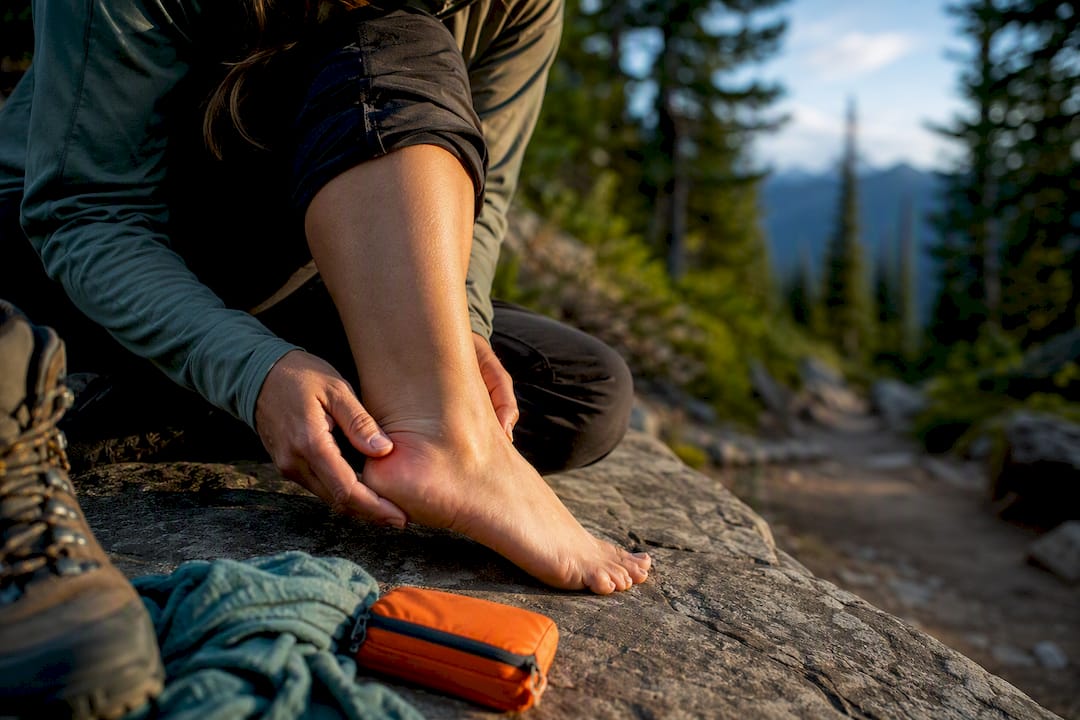
Stop walking the second you feel a hot spot, cover it with tape or a lubricant before it blisters, and if a blister does form, leave the roof intact whenever possible, as advised in glacier hiking tips to stay safe and prepared. Only drain a blister that is large, tense, or genuinely limiting your gait, and always use sterile technique. Prevention through proper fit, moisture control, and taping does more for your feet than any treatment you’ll apply after the damage is done.
TL;DR:
Proper fit and moisture control, including changing socks on breaks, significantly reduce blister risk during hikes, especially in wet or hot conditions.
Applying lubricant and pre-taping high-risk spots before starting your hike offers better prevention than treating blisters after they form.
Stopping immediately at the first sign of a hot spot and inspecting the skin prevents minor irritation from turning into a full-blown blister.
Only drain large, tense, or gait-affecting blisters using sterile techniques, leaving the roof intact when possible to minimize infection risk.
Carrying a lightweight blister kit with hydrocolloid dressings, tape, antiseptic wipes, and a sterile needle is essential for effective on-trail management.
Table of Contents
What Causes Blisters on the Trail (and How to Spot a Hot Spot Early)
A blister forms when repeated friction, or shear, separates layers of skin and the gap fills with fluid. Moisture accelerates this dramatically. Sweaty or wet feet blister at far lower friction levels than dry ones, which is why dry socks mid-hike matter more than people assume. Pressure from an ill-fitting boot adds a third variable, concentrating that shear force in one spot instead of spreading it out.
Certain zones take the brunt of it on almost every hike:
The back of the heel, where boot rub is constant
The pinky toe, squeezed against the shoe wall
The ball of the foot, absorbing impact on descents
Toe knuckles, especially in narrow or worn-out footwear
A hot spot announces itself as a localized warm, reddened patch with a stinging or burning sensation. That’s different from generic soreness or a bruise. Wilderness medicine training treats this warning sign as urgent. NOLS instructors emphasize catching hot spots within minutes, because a few minutes of neglect can mean days of limited mobility later. Ignoring the sting and pushing on is how a coin-sized annoyance becomes a hike-ending wound.
Preventing Blisters: Fit, Socks, Lubrication, and Taping That Actually Work
Prevention beats treatment every time, and it starts before you ever leave the trailhead. Here’s the order of operations that matters most:
Check boot fit first. You want a small amount of clearance in front of your longest toe to allow for swelling on long descents, plus a snug heel that doesn’t lift when you walk. Mayo Clinic’s first-aid guidance treats fit as the foundation of blister prevention, not an afterthought.
Break in new boots on short walks, never on a multi-day trip. Stiff, unbroken leather or synthetic uppers rub in exactly the spots that later blister.
Run a double-sock system. A thin synthetic or wool liner sock under a cushioned hiking sock reduces the friction that would otherwise hit your skin directly. Skip cotton entirely. It holds moisture against skin and offers zero insulation once wet.
Swap socks at breaks. If your feet are damp by midday, a dry pair takes seconds to put on and meaningfully cuts blister risk for the afternoon miles.
Apply lubricant to known trouble zones before you start. Petroleum jelly or a dedicated anti-chafe balm lowers the coefficient of friction between skin and sock, and reapplying every few hours on hot, sweaty days keeps that protection working.
Tape high-risk spots preemptively. Leukotape is the standard here. It’s a rigid, adhesive-backed cotton tape that stays put through sweat and stream crossings far longer than moleskin, and podiatric guidance names it alongside heel-lock lacing as one of the most durable prevention tools available for multi-day treks.
Lace with a heel lock (runner’s loop). This lacing pattern pulls the heel snug into the boot’s heel cup, cutting the micro-slip that causes most heel blisters. It matters more than sock choice alone for that specific spot.
Pro Tip: Set your heel-lock lacing before you leave the car, not three miles in when you first feel a rub. It takes thirty seconds and it’s far easier to adjust laces on solid ground than balanced on a rock with a sock half off.
What to Do When a Hot Spot Appears Mid-Hike
The moment you feel that warning sting, stop. Don’t tell yourself you’ll deal with it at the next break. Take off your boot and sock, and inspect the skin directly.
Here’s the sequence that actually works on trail:
Remove any debris, sand, or grit trapped against the skin.
Let the foot air dry for a minute or two before reapplying anything. Trapping moisture under a fresh dressing defeats the purpose.
Apply lubricant to a reddened but unbroken hot spot, or cover it with a strip of tape smoothed flat with no wrinkles.
If a small blister has already formed and you can still hike comfortably, cut a donut-shaped pad from moleskin or foam and place it around, not on, the blister to redirect pressure to the surrounding skin instead of the wound itself.
For a blister that’s already intact and not causing serious pain, the best move is often to leave it completely alone. Mayo Clinic recommends keeping the blister roof intact when possible, since that layer of skin functions as a natural, sterile barrier against infection far better than anything you can apply over broken skin. A hydrocolloid bandage over an intact blister does the rest of the work. These pads absorb any fluid, cushion the area, and stay adhered through sweat and water crossings better than standard bandages, and SectionHiker’s field testing consistently favors hydrocolloid pads over plain gauze or tape for exactly this reason.
Check it once or twice a day. If it stays intact, comfortable, and shows no spreading redness, just keep monitoring and let your body do the healing.
Draining a Blister Safely: When It’s Necessary and How to Do It Right
Draining should be a last resort, not a default habit. Ask three questions before you reach for a needle: is the blister large enough that pressure alone is causing pain, is it so tense that it’s likely to burst messily on its own, and is it changing how you walk? If you answer yes to any of those, drainage is reasonable. A small, comfortable blister that isn’t affecting your stride doesn’t need to be touched.
When drainage is warranted, follow this protocol:
Wash your hands and clean the blister and surrounding skin with an antiseptic wipe.
Sterilize a needle or pin with rubbing alcohol or a flame, then let it cool.
Puncture at the base of the blister, the lowest point, so gravity helps fluid drain out rather than pool inside. On unusually large blisters, two small opposing punctures at the base prevent the blister from re-pressurizing later in the day.
Gently press the fluid out with clean gauze, but leave the deflated skin roof in place as a protective cover rather than trimming it away.
Clean the area again once fluid is expressed.
Pro Tip: Never puncture the top or center of a blister. Draining from the base uses gravity in your favor and leaves a flatter, less irritated roof once it’s empty.
Aftercare matters as much as the puncture itself. Cleanse the area, apply a thin layer of antibiotic ointment or a plant-based alternative as an adjunct, and cover with a hydrocolloid dressing to cushion the deflated skin through the rest of your miles. Skip duct tape here entirely. The American Hiking Society specifically warns against duct tape on open blisters because its adhesive and lack of breathability can trap moisture and raise infection risk.
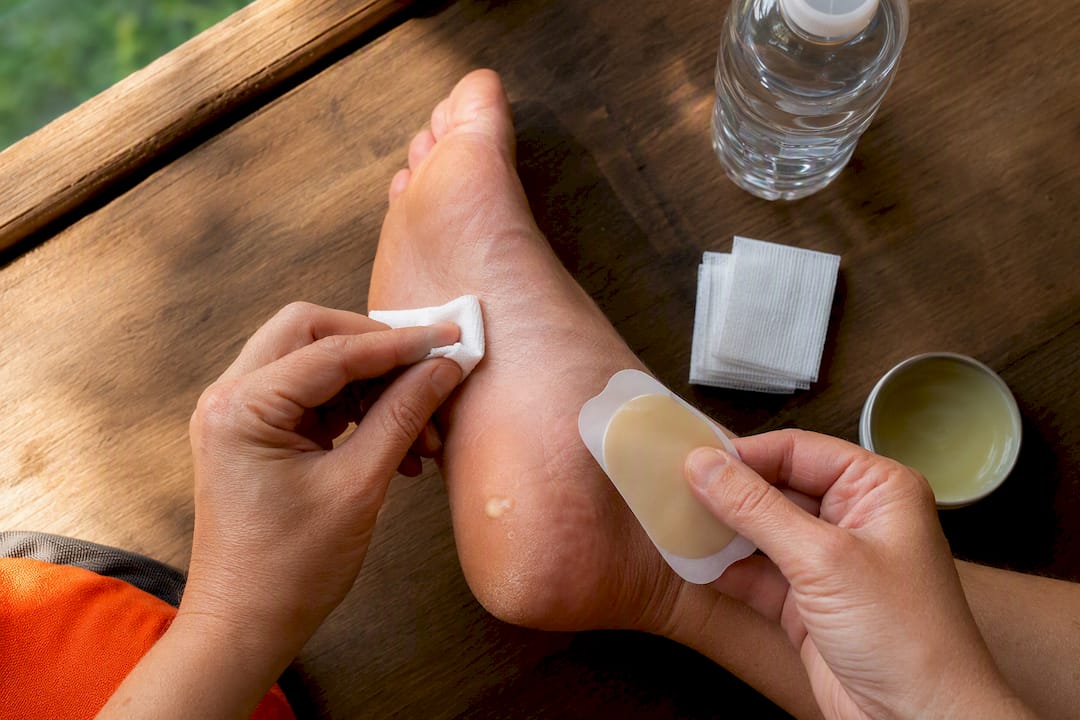
Building a Lightweight Blister Kit for the Trail
A functional blister kit fits in a sandwich bag and weighs almost nothing, but it needs the right core items:
Individually wrapped antiseptic wipes for cleaning skin before treatment
Hydrocolloid bandages in two or three sizes
Moleskin or foam for donut padding around larger blisters
A roll of Leukotape for preventive taping and heel-lock reinforcement
A sterile needle or lancet, plus a small alcohol wipe to sterilize it
One spare pair of hiking socks
Ultralight hikers can trim moleskin in favor of tape alone, since a well-cut piece of Leukotape often does both jobs. Whatever you carry, keep it in an outer pocket or hip belt pouch you can reach without unpacking your whole bag. A hot spot ignored for the ten minutes it takes to dig through a stuffed backpack is a hot spot that becomes a blister.
When to Stop Hiking and Get Medical Help
Most blisters resolve with basic trail care, but certain signs mean it’s time to prioritize getting off trail over finishing your mileage. Watch for spreading redness, increasing pain, pus, red streaking away from the wound, fever, or chills. The American Hiking Society lists these as clear signals to seek professional evaluation rather than push through. Large blood blisters or any wound with visible tissue loss also warrant a medical opinion. While you arrange help, keep the area clean, covered, and as dry as conditions allow.
Where a Plant-Based Ointment Fits Into Blister Aftercare
Once a blister roof breaks, whether from a fall, a rub, or an intentional drain, you’re managing an open wound, not just a pressure point anymore. That’s the moment when a topical product earns its place. Clean the area first, apply a thin layer, and cover it with a sterile dressing to keep dirt and moisture out while the skin rebuilds.
A plant-based ointment designed for exactly this kind of soft-tissue support is available, with ingredient list and usage guidelines provided for hikers who prefer a chemical-free option to conventional antibiotic ointments. It’s an adjunct to sterile technique, not a substitute for cleaning the wound properly first.
Blister Care Changes With the Conditions You’re Hiking In
Wet environments punish feet fastest. River crossings, rain, and humid trail systems keep skin softened and prone to breaking down, so drying feet at every real opportunity and switching to a fresh liner sock mid-day matters more here than almost any other single habit. Waterproof boots that trap sweat inside can actually work against you in warm, wet climates, since the moisture has nowhere to escape.
Dry, hot conditions bring a different failure mode: friction climbs as feet swell in the afternoon heat, and salt from dried sweat can stiffen sock fabric enough to increase rubbing. Lubricant reapplication becomes the priority, along with loosening laces slightly as your feet expand over the course of a hot day.
Cold weather adds a layering problem. Thicker socks needed for warmth can crowd boots that fit fine in summer, so a boot that has 0.5 inches of toe clearance in July might feel tight with winter-weight wool in December. Test your full cold-weather sock system before a big trip, not on day one of it. Numb feet in freezing conditions also mask the early sting of a hot spot, which means cold-weather hikers need to physically check their feet at breaks rather than rely on feeling a problem coming.
Across all three conditions, the fundamentals hold. Dry when you can, protect known trouble spots before they flare, and inspect rather than assume.
Why Prevention Habits Matter More Than Any Product
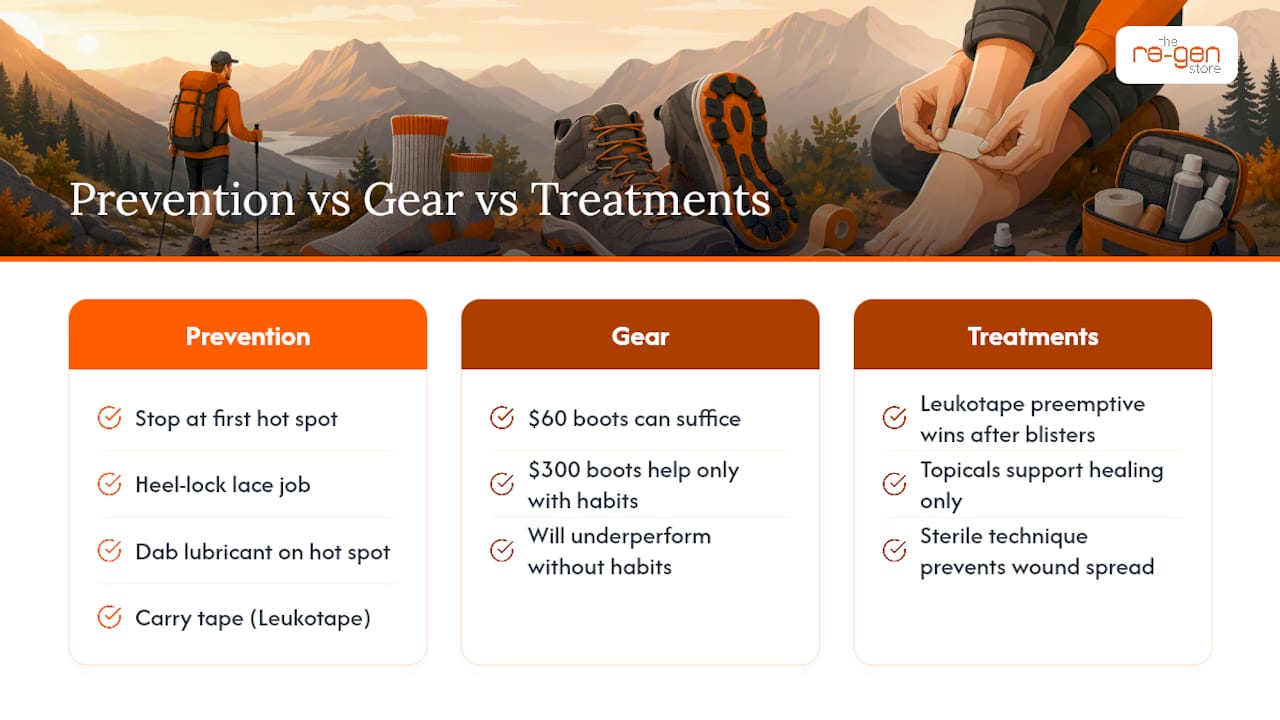
The gap between hikers who finish multi-day treks blister-free and those who don’t rarely comes down to gear quality. It comes down to whether they stop the moment something feels wrong. A $60 pair of boots with a heel-lock lace job and a dab of lubricant on a known hot spot will outperform a $300 pair worn without either habit.
If you carry one item, make it tape. Leukotape applied preemptively to a spot that’s blistered before beats every treatment option available once the skin has already broken. And treat any topical product, plant-based or otherwise, as support for healing skin, not a replacement for the sterile technique that keeps a small wound from becoming a bigger problem.
— Kyle
Caring for Broken Skin After a Blister: A Gentler Option
If you’ve drained a blister or the roof has already torn, you’re past the prevention stage and into wound care. This is where Theregenstore’s plant-based ointment offers a genuine alternative to the antibiotic ointments most hikers default to. It’s formulated without petroleum or synthetic chemicals, which appeals to health-conscious hikers who want their first-aid kit to match the same natural standards they apply to food or skincare at home.

Using it is straightforward: clean the broken skin first with an antiseptic wipe, pat dry, apply a thin layer of the Re-gen plant-based regenerative ointment, and cover with a sterile hydrocolloid dressing to protect it through the rest of your hike. For readers comparing it against conventional options, Theregenstore has a direct breakdown of how it stacks up as a natural alternative to Neosporin, including full ingredient transparency and usage instructions. If a wound shows signs of infection, prioritize professional medical care over any topical product. For everyday trail wounds and post-drain aftercare, visit Theregenstore to see sizing options and order before your next trip.
Where to Learn More About Blister Prevention and Wilderness First Aid
For deeper reading beyond this guide, Mayo Clinic’s blister first-aid page covers general wound care standards, while NOLS offers wilderness-specific protocols for backcountry settings. REI’s expert advice hub and SectionHiker’s field-tested treatment guide both add practical detail from experienced trail use, and the American Hiking Society rounds out the picture with clear infection warning signs. For post-drain skin care specifics, Theregenstore’s page on petroleum-free wound treatment is worth bookmarking too.
Sources
FAQ
Is it better to cover a blister or let it air out?
Cover it. An intact blister roof or a hydrocolloid dressing over broken skin protects against dirt and further friction far better than open air, which just exposes the wound to bacteria and continued rubbing.
Is it okay to keep walking on a blister?
You can keep walking on a small, intact blister if you pad it properly with donut-style moleskin to relieve pressure, but a large or gait-altering blister needs draining and dressing before you continue.
What is the fastest way to heal a blister?
Keep the roof intact if possible, protect it with a hydrocolloid dressing, and avoid repeated friction on the area. If it’s already open, clean it, apply a thin layer of antibiotic or plant-based ointment, and cover it to support faster healing.
Why do hikers use Vaseline on their feet?
Petroleum jelly reduces friction between skin and socks, which is why many hikers apply it to known hot spots before a hike as a simple, effective prevention step.
How often should I check my feet on a multi-day hike?
Check at every break, at minimum once in the morning and once midday, since catching a hot spot in its first few minutes prevents it from becoming a full blister by camp.
Recommended
Comments